Running Linux on a Litex SoC.
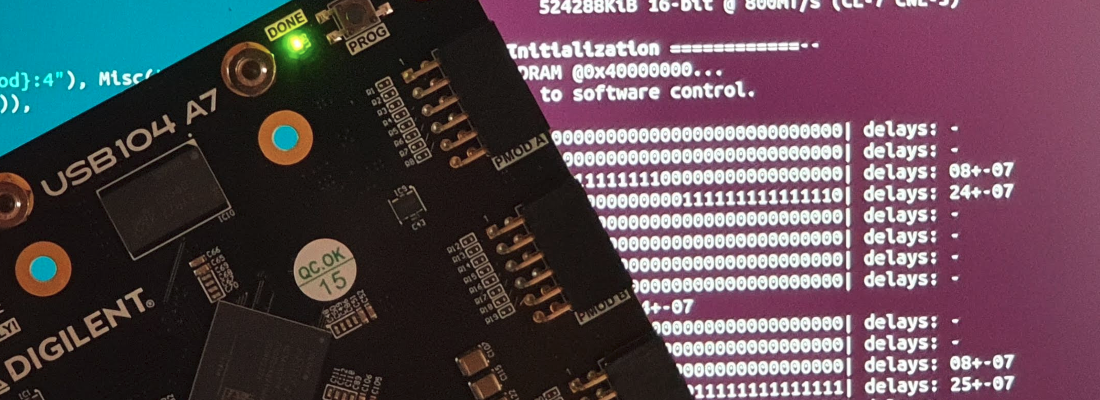
 Arty A7
That FPGA are very versatile devices is something that everybody knows, and the fact that you can implement inside many different processors makes the FPGA very interesting devices for test different processors architectures. In this blog we already saw the benefits of Litex, and how you can implement a processor of a large list in less than five minutes. Among these processors we can find very efficient RiscV processors like SERV, or a huge processors like Rocket64 with high capabilities. Other processor that has big capabilities is the VexRisc processor from SpinalHDL, that is capable to run a Linux distribution in a little FPGA like the Xilinx Artix 35T. To make this possible, Enjoy Digital, the engineers behind the Litex framework, has created a project named Linux-on-Litex, that using Litex, generates a SoC capable to run Linux. Now, there are 2 different projects, one of them using a Rocket CPU and the other one using a VexRisc CPU. The project using the VexRisc CPU is the one I will use.
First of all, to obtain all the information about the project, the best is navigate to their Github repository, where you can find many information about the requirements and dependencies you need to have in your computer. The specific requieriments to compile the VexRiscv core are here. Also, is important that the project allows you to generate your own Linux image, in that case you have to do it from a Linux PC.
The first that we need to do is clone the Litex repository and the linux on litex repository.
pablo@friday:~$ git clone [email protected]:enjoy-digital/litex.git
And also the linux-on-litex-vexriscv repository.
pablo@friday:~$ git clone [email protected]:litex-hub/linux-on-litex-vexriscv.git
Now we are going to checkout the last tag on the Litex repository, at this time the last tag is 2021.12. Then we can install it in the case that we have not installed Litex yet. In case that you already have Litex installed on your system, you will need to update all the dependencies to the current tag, to make all compatible. You can do that executing the next command.
pablo@friday:~/litex$ ./litex_setup.py --update
At this point we have the Litex project updated and all coherent. Now the next step is so easy as execute from thenlinux-on-litex folder the next command:
pablo@friday:~/linux-on-litex-vexriscv$ ./make.py --board arty --build
This would be the easy way, but the make command has many available arguments. All of them can be shown executing the help command,
pablo@friday:~/linux-on-litex-vexriscv$ ./make.py --help
usage: make.py [-h] --board BOARD [--device DEVICE] [--variant VARIANT] [--toolchain TOOLCHAIN] [--uart-baudrate UART_BAUDRATE]
               [--build] [--load] [--flash] [--doc] [--local-ip LOCAL_IP] [--remote-ip REMOTE_IP]
               [--spi-data-width SPI_DATA_WIDTH] [--spi-clk-freq SPI_CLK_FREQ] [--fdtoverlays FDTOVERLAYS]
               [--cpu-count CPU_COUNT] [--with-coherent-dma] [--without-coherent-dma] [--dcache-width DCACHE_WIDTH]
               [--icache-width ICACHE_WIDTH] [--dcache-size DCACHE_SIZE] [--dcache-ways DCACHE_WAYS]
               [--icache-size ICACHE_SIZE] [--icache-ways ICACHE_WAYS] [--aes-instruction AES_INSTRUCTION]
               [--without-out-of-order-decoder] [--with-wishbone-memory] [--with-fpu] [--cpu-per-fpu CPU_PER_FPU] [--with-rvc]
               [--dtlb-size DTLB_SIZE] [--itlb-size ITLB_SIZE]
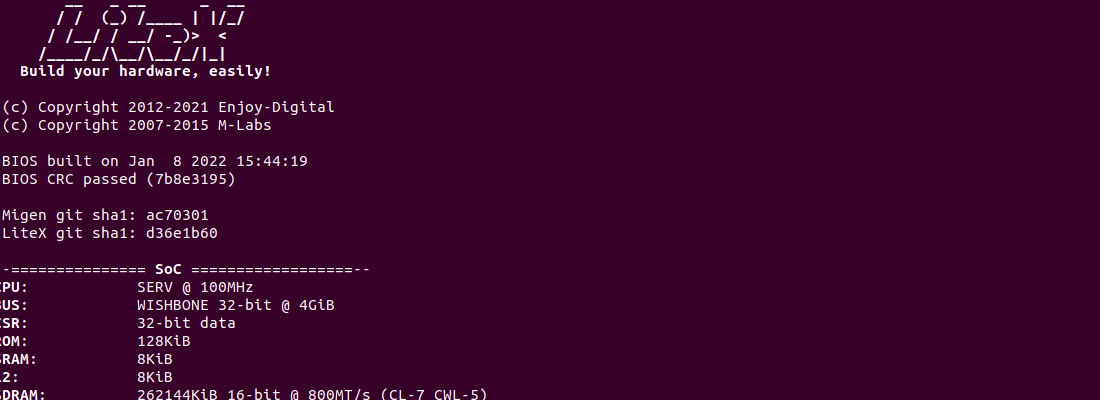
We can select the board we are using among all the boards supported by Litex with more than 32 MB of RAM, in my case I am using the original Arty board that is based on an Artix A35t FPGA. We also can change the UART baudrate, and this is very useful because the Linux image is downloaded to the board through the UART, so we can reduce the time configuring a high rate. Other arguments that could be useful are the number of soft-cores and whether we want to add a floating point unit (FPU) or not. regarding the implementation, like Litex, this project allow to use different environments for Xilinx devices like Yosys or Vivado (default).
Then, go with the numbers. For a single core processor without FPU the amount of logic used is 57 %, which is a very light design.

For a two softcores the number obviously has increased but the amount of logic is 80 %, that for a two core system running Linux is less that I could expect.

Once we have the design implemented, we can load the design into the FPGA executing the next command.
pablo@friday:~/linux-on-litex-vexriscv$ ./make.py --board arty --load
Once we have the design load into the board, we can upload the linux image. At this point, on the /images folder you will find some files. If some file is missing you can download the files from this link. Also, in the same link, you can found a prebuilt image for the arty board and the orange crab board. In my case I have had to use the link because the file “Image” has not been created, so I have downloaded the image. Actually, the image of that link has been updated few days ago, so it is updated to the last release.
The next is load the image, and at this point, the baudrate configured turns important, since the image has to be upload to the board. For a baudrate of 115 kbps, the time spent in the upload is around 10 minutes, that is too much, so I recommend to increase the baudrate all as the USB – UART transceiver accepts. The FPGA devices can manage up to 3 Mbps, so 1 Mbps could be a good option. To upload the image we will use a tool installed with litex, litex_term, that opens a serial terminal with the option to upload files.
pablo@friday:~/linux-on-litex-vexriscv$ litex_term --images=images/boot.json /dev/ttyUSB1

At this point, the image will be uploaded, and we will see the Linux boot process.

Once the boot process is finished, we have to log in using the user ‘root’. Since the Arty board has ethernet connection, and the python defiition of the board has it defined, we can connect the board to an ethernet cable and configure an IP using the next command.
root@buildroot:~# ifconfig eth0 192.168.1.50
root@buildroot:~# ifconfig -a
eth0      Link encap:Ethernet  HWaddr 16:26:F4:78:2D:F2
          inet addr:192.168.1.50  Bcast:192.168.1.255  Mask:255.255.255.0
          inet6 addr: fe80::1426:f4ff:fe78:2df2/64 Scope:Link
          UP BROADCAST RUNNING MULTICAST  MTU:1500  Metric:1
          RX packets:1 errors:0 dropped:1 overruns:0 frame:0
          TX packets:5 errors:0 dropped:0 overruns:0 carrier:0
          collisions:0 txqueuelen:1000
          RX bytes:60 (60.0 B)  TX bytes:426 (426.0 B)
          Interrupt:2

lo        Link encap:Local Loopback
          inet addr:127.0.0.1  Mask:255.0.0.0
          inet6 addr: ::1/128 Scope:Host
          UP LOOPBACK RUNNING  MTU:65536  Metric:1
          RX packets:0 errors:0 dropped:0 overruns:0 frame:0
          TX packets:0 errors:0 dropped:0 overruns:0 carrier:0
          collisions:0 txqueuelen:1000
          RX bytes:0 (0.0 B)  TX bytes:0 (0.0 B)

sit0      Link encap:IPv6-in-IPv4
          NOARP  MTU:1480  Metric:1
          RX packets:0 errors:0 dropped:0 overruns:0 frame:0
          TX packets:0 errors:0 dropped:0 overruns:0 carrier:0
          collisions:0 txqueuelen:1000
          RX bytes:0 (0.0 B)  TX bytes:0 (0.0 B)
Also, if we navigate to /sys/class we can see all the drivers we have installed to manage some hardware elements.
root@buildroot:~# cd /sys/class/
bdi/           graphics/      mem/           pps/           tty/
block/         hwmon/         misc/          ptp/           vc/
devlink/       i2c-adapter/   mmc_host/      pwm/           vtconsole/
drm/           i2c-dev/       mtd/           spi_master/
fpga_manager/  input/         net/           spidev/
The Linux image that is provided with linux-on-litex is reduced, so if we need an specific package o support for an specific hardware we will need to build our own Linux image. To do this we will use buildroot, so we can create a customized Linux image. Consider that if you create a Linux image with many drivers and packages, the RAM size requirement will be increased.
Since I knew the Litex project I though that it is a great project with great people behind (they solve your doubts very quickly). From my experience, when I made the post using Litex, all the project ran at the first try following all the steps and ensure that all the dependencies are installed. For this post I had some difficulties, but finally, following the steps I explained in the post, the project will run. This could be related to the fact that the Litex project has six tags, while linux-on-litex has no tags yet. Linux-on-litex seems an evolution of the Litex SoC, and shows the capabilities all the Litex ecosystem. Remember that the soft-core is defined in Python, and using migen this code ins translated in a HDL code. In short, if you need to have a generic SoC running Linux in a couple of hours it will be a excellent option. If what you are looking for is a customizable SoC with a custom Linux image, you will have to spend many much time either by using Litex, or other environment.