Getting started with the RP2040 PMOD
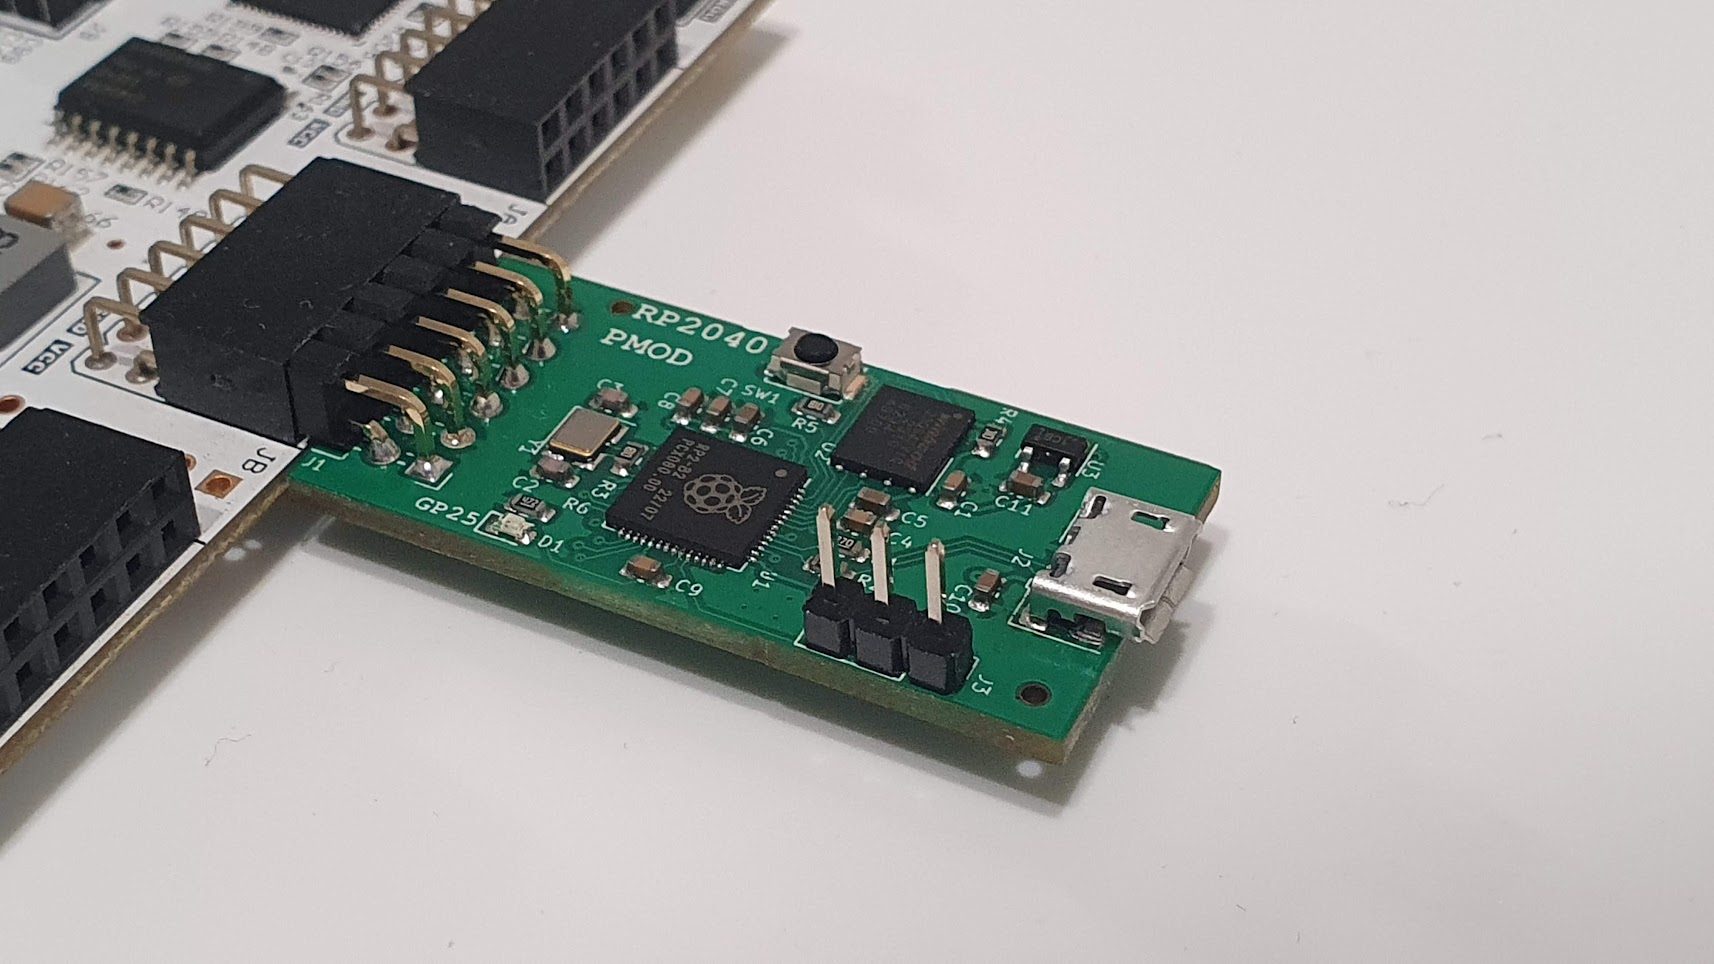
The end of 2023 has been a HW time. I have developed some boards that I will use in 2024 in different projects. One of the last boards of the year is the RP2040 PMOD, a PMOD-compatible board with a Raspberry PI microcontroller, the RP2040. This microcontroller is well-known in the community because of its power. The RP2040 features a dual-core Cortex-M0+ at 133 MHz, 30 GPIOs, 4 analog inputs, 2 UARTS, 2 I2C, 2 SPI, 16 PWM… but, what is the interest of having a microcontroller in a PMOD? Are not the PMODs peripherals? yes, the PMOD are usually peripherals but using a microcontroller instead of a peripheral allows us to create different peripherals with the same board, for example, using the SPI interface of the RP2040 we can emulate an SPI device to test an SPI Master IP running in our FPGA, and the same for I2C peripherals, so, although the RP2040 PMOD is indeed a microcontroller PMOD, you can use it as a regular peripheral, and this reconfigurability is what made that I decided to develop this board.
Not just SPI and i2C peripherals can be emulated, many projects use the RP2040 to emulate other non-native peripherals using bit-banging, like the JTAG, that uses the pico-dirtyJtag project. Are not those open-source projects great?
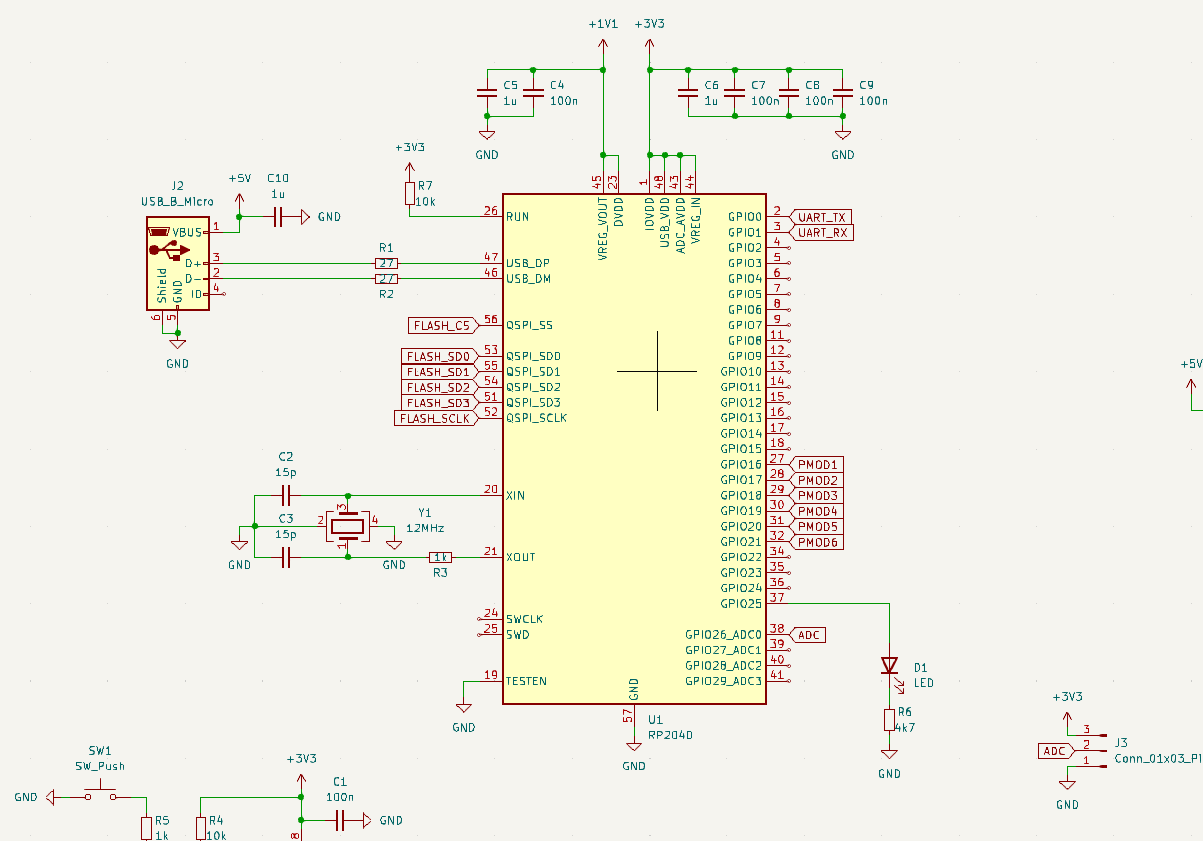
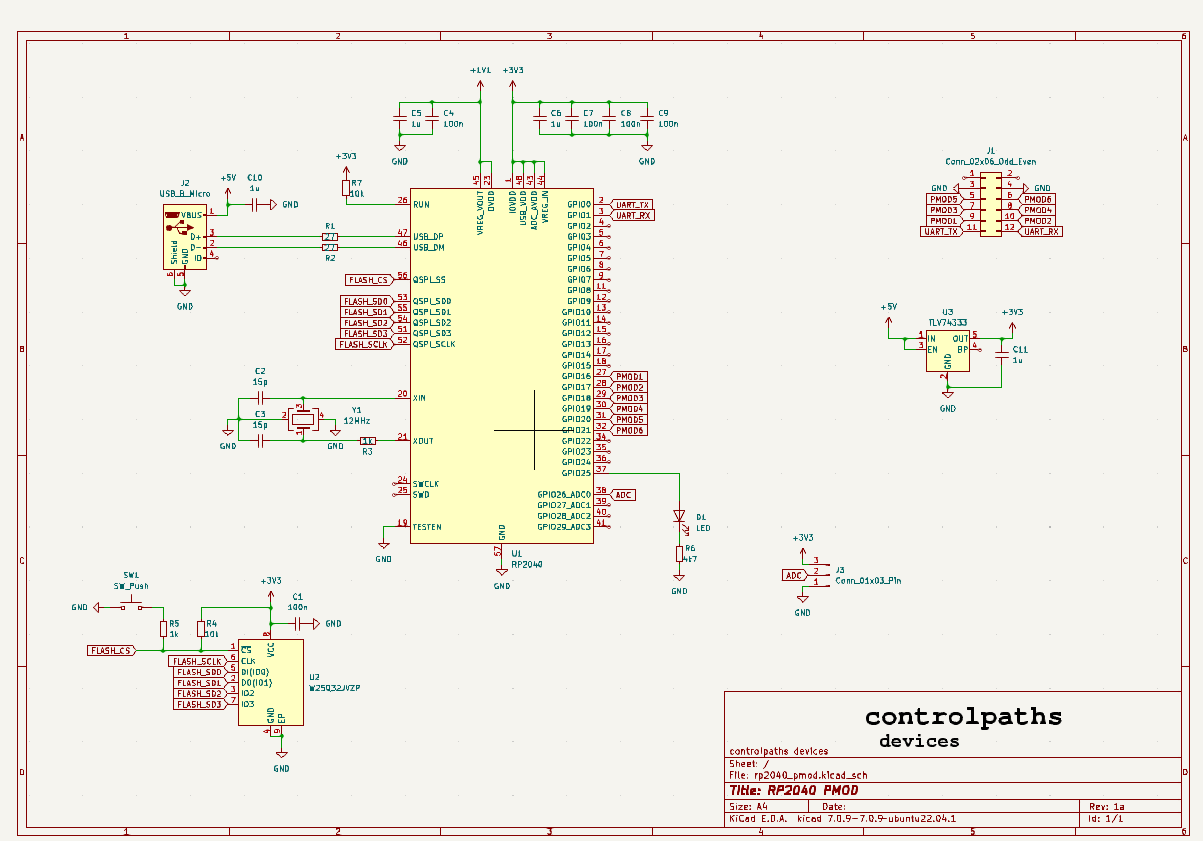
The configuration of the RP2040 is the same as you can find in many other RP2040-based boards.
The board includes its own 3v3 LDO regulator, so it can be used standalone as an RP2040 development board. To program the board, a push button is included to stop the boot process and put the board into a programmable mode through an external storage unit created in the computer.
The external connection of the RP2040 is an LED connected to the GPIO 25, a PMOD-compatible connector (J1) and also an ADC input connected to an extra pin header (J3).
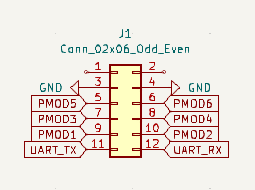
Each port of the PMOD is connected to different peripherals, and according to the configuration of te RP2040, one of them will be connected to the GPIO. For the RP2040 PMOD pins, you can use these peripherals.
| PMOD PIN | Schematic | GPIO | Fuction |
|---|---|---|---|
| 1 | NC | – | – |
| 2 | NC | – | – |
| 3 | GND | – | GND |
| 4 | GND | – | GND |
| 5 | PMOD5 | 20 | SPI0 RX / UART1 TX / I2C0 SDA |
| 6 | PMOD6 | 21 | SPI0 CSn / UART1 RX / I2C0 SCL |
| 7 | PMOD3 | 18 | SPI0 SCK / UART0 CTS / I2C1 SDA |
| 8 | PMOD4 | 19 | SPI0 TX / UART0 RTS / I2C1 SCL |
| 9 | PMOD1 | 16 | SPI0 RX / UART0 TX / I2C0 SDA |
| 10 | PMOD2 | 17 | SPI0 CSn / UART0 RX / I2C0 SCL |
| 11 | UART_TX | 0 | SPI0 RX / UART0 TX / I2C0 SDA |
| 12 | UART_RX | 1 | SPI0 CSn / UART0 RX / I2C0 SCL |
As you can see, the board is prepared to route any communication interface to different pins, including up to two UART ports or two different I2C interfaces.
To start developing with the RP2040, we need to download the repository pico-sdk from GitHub. This repository contains all the tools to compile and link the files to deploy them into an RP2040. To clone the repository, we just need to execute git clone https://github.com/raspberrypi/pico-sdk.git in a terminal. When the repository is downloaded, the last version released is 1.5.1, so we can checkout our local repository for that version to have a stable release.
pablo@miercoles:~$ mkdir rp2040
pablo@miercoles:~$ cd rp2040/
pablo@miercoles:~/rp2040$ git clone https://github.com/raspberrypi/pico-sdk.git
Cloning into 'pico-sdk'...
remote: Enumerating objects: 7697, done.
remote: Counting objects: 100% (2351/2351), done.
remote: Compressing objects: 100% (493/493), done.
remote: Total 7697 (delta 1943), reused 1926 (delta 1831), pack-reused 5346
Receiving objects: 100% (7697/7697), 2.65 MiB | 959.00 KiB/s, done.
Resolving deltas: 100% (4218/4218), done.
pablo@miercoles:~/rp2040$ cd pico-sdk/
pablo@miercoles:~/rp2040/pico-sdk$ git checkout 1.5.1
Although this repository contains all the files needed from Raspberry Pi, other libraries have to be downloaded from other repositories. This is the case of the TinyUSB library, the library used to develop USB projects. All the external projects that support by default the Raspberry Pi Pico, and therefore the RP2040 are added to the pico-sdk repository as submodules, so we just need to update all the submodules. To do this, we have to execute the next commands in the terminal.
pablo@miercoles:~/rp2040/pico-sdk$ git submodule sync --recursive
pablo@miercoles:~/rp2040/pico-sdk$ git submodule update --init --recursive
At this point, we have “installed” the SDK to work with the RP2040 PMOD. As we saw before, this board has connected to the PMOD connector 8 pins which include two different UART ports, SPI and I2C. An interesting use of the RP2040 PMOD is to use it as FT2232 PMOD implementing a USB-UART bridge with up to two different UART ports. In the controlpaths GitHub you will find a project called pico-uart-bridge, this project is a fork from the Noltari project, but it contains all the modifications to make it work in the RP2040 PMOD. The modifications includes changes in the pico-sdk repository, which has been modified to point to the one located also in my repository, where the RP2040 PMOD is added as a new board. To do this I have added the file rp2040_pmod.h into the pico-sdk/src/boards/include/boards/ repository. This new file is based on the original pico-sdk/src/boards/include/boards/pico.h, but it contains the modifications in the default peripheral pins, and also has added a definition with an extra delay in the boot due to a delay in the oscillator frequency stabilization.
// --- I2C ---
#ifndef PICO_DEFAULT_I2C
#define PICO_DEFAULT_I2C 0
#endif
#ifndef PICO_DEFAULT_I2C_SDA_PIN
#define PICO_DEFAULT_I2C_SDA_PIN 16
#endif
#ifndef PICO_DEFAULT_I2C_SCL_PIN
#define PICO_DEFAULT_I2C_SCL_PIN 17
#endif

// --- SPI ---
#ifndef PICO_DEFAULT_SPI
#define PICO_DEFAULT_SPI 0
#endif
#ifndef PICO_DEFAULT_SPI_SCK_PIN
#define PICO_DEFAULT_SPI_SCK_PIN 18
#endif
#ifndef PICO_DEFAULT_SPI_TX_PIN
#define PICO_DEFAULT_SPI_TX_PIN 19
#endif
#ifndef PICO_DEFAULT_SPI_RX_PIN
#define PICO_DEFAULT_SPI_RX_PIN 20
#endif
#ifndef PICO_DEFAULT_SPI_CSN_PIN
#define PICO_DEFAULT_SPI_CSN_PIN 21
#endif

...

// Needed to increase the delay in order to ensure that the oscillator frequency is stable.
#define PICO_XOSC_STARTUP_DELAY_MULTIPLIER 64
Also, the file uart-bridge.c from the pico-uart-bridge repository has been modified to use the pins used in the RP2040 PMOD.
const uart_id_t UART_ID[CFG_TUD_CDC] = {
	{
		.inst = uart0,
		.irq = UART0_IRQ,
		.irq_fn = &uart0_irq_fn,
		.tx_pin = 0,
		.rx_pin = 1,
	}, {
		.inst = uart1,
		.irq = UART1_IRQ,
		.irq_fn = &uart1_irq_fn,
		.tx_pin = 20,
		.rx_pin = 21,
	}
};
To create the uf2 file to program the RP2040, the original repository have the script build.sh. In the forked repository, I have added that the board used is the RP2040 PMOD in the cmake command.
cmake -DPICO_BOARD=rp2040_pmod -B $BUILD_DIR -S $BASE_DIR
In summary, you just need to clone the forked pico-uart-bridge repository and execute the script build.sh to have your project working. Or the easiest way, take the uf2 file located in the /output directory and burn the RP2040 PMOD.
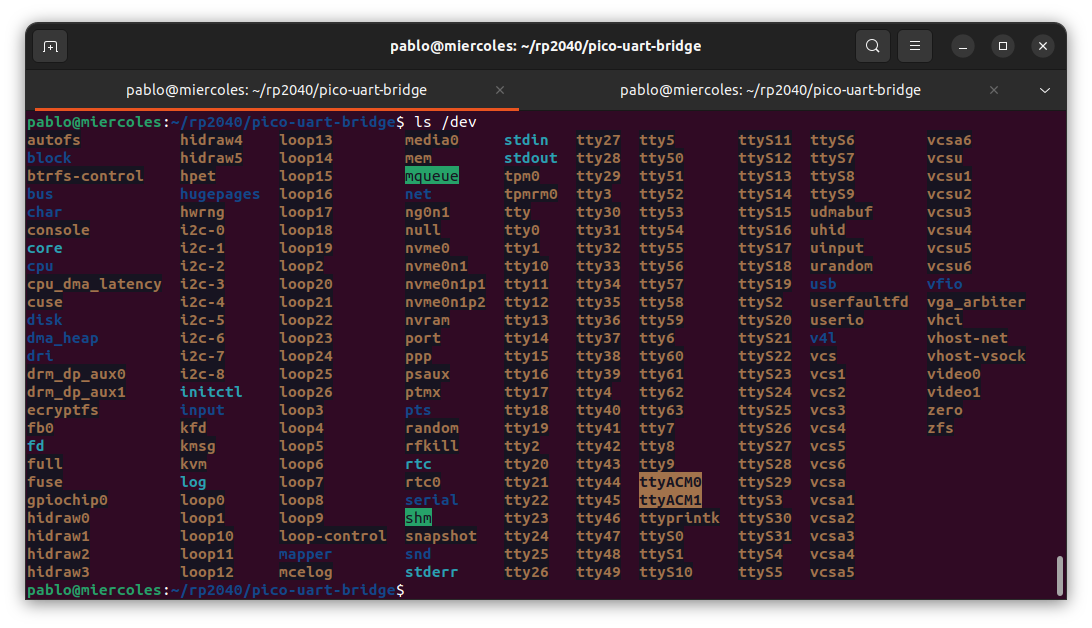
When the RP2040 PMOD is programmed, if we list the devices we will see two different ttyACM ports.
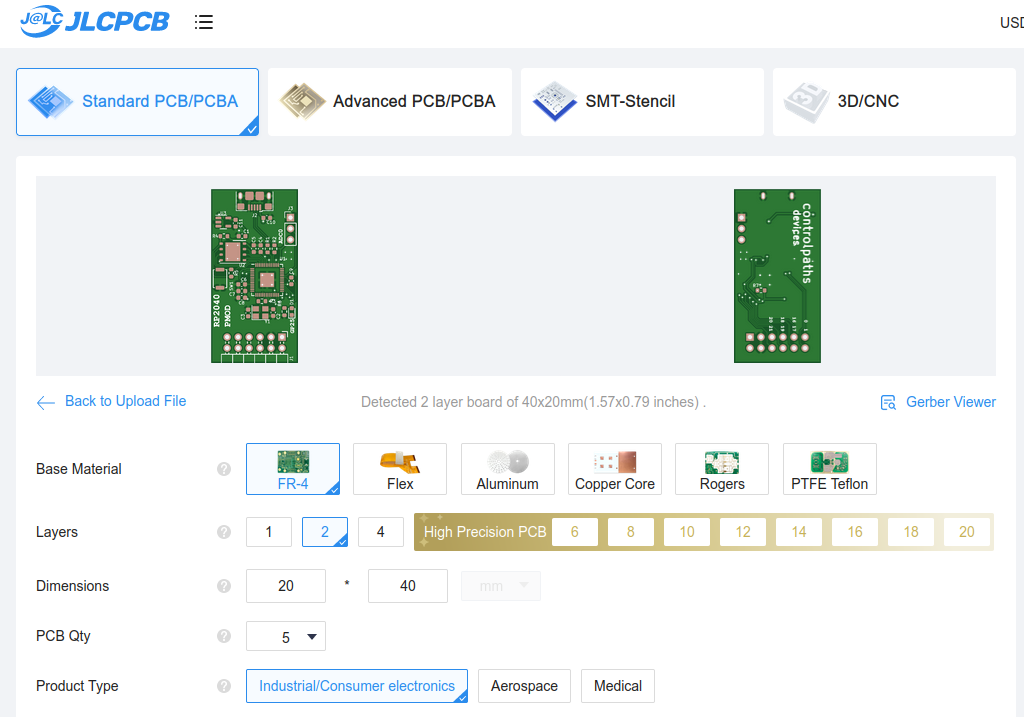
As always, the RP2040 is open-source, so you can download the output files from my repository. In my case, I used the PCB manufacturing services and the PCB Assembly from JLCPCB. To create your board, you just need to navigate to jlcpcb.com, and upload the files.
Then you have to select the PCB Assembly service, upload the centroid file and the BOM, and you will receive your board in a few days. Manufacturing the board using this service is cheap, but if you just need one board, you can contact me.
Merry Christmas and I wish you a 2024 full of FPGAs!


