Running Petalinux 2023.2 on the KD240

 KD240
KD240
Every year, AMD releases several versions of all its development environments. From Vibado to Petalinux, all the environments are updated and introduce several changes in the way we use them. In this article, we are going to generate a hardware project with the KD240, and then we will create a Linux distribution for that board using the latest version (for now), the 2023.2.
First of all, as usual, when we are working with Zynq MPSOC devices, we need to develop the hardware project, so we need to open Vivado and create a new project. the board I am going to use is the KD240, a board that features the Kria K24 SOM.

This SOM has two different connectors, a big one with 240 pins, and a little one with just 40 pins. In the project creation process, we can select what is connected to that connectors. Since I am using the KD240 kit, I have selected the connections that correspond with this board.

Now, when the project is created, we can create a block design. The block design I am going to create is very simple. The reason is the this design will be a base design. Later, we may change the PL design from Petalinux.
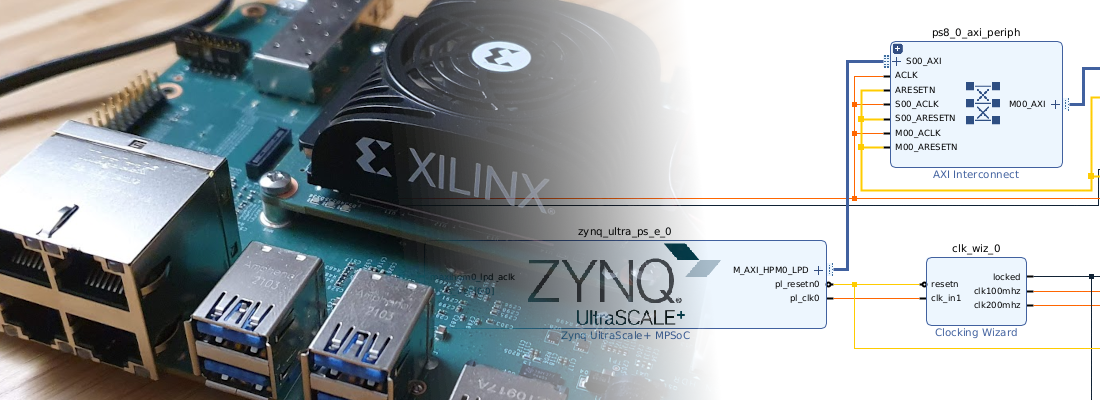
From the Board tab, I have dragged the two LEDs connected to the PL. When they are added to the block design, Vivado asks us whether we want to add also the controller for these LEDs, which is an AXI_GPIO peripheral. We just have to accept and the AXI_GPIO will be added and connected to the LEDs. Now we have to connect the AXI interface, but this can be done automatically by clicking on the Run Connection Automation banner in the top of the block design. The resulting design will be the next.

Now, we just need to generate the wrapper, generate the bitstream, and export the hardware including the bitstream (more info here ).
When the hardware design is complete, the next step is the Linux compilation. Now, to make this step faster, I am going to use this time the Board Support Package of the KD240 kit from AMD. If you are familiar with embedded Linux devices, I am pretty sure that you download these kinds of files to generate the Linux images for your ARM boards. These files are available on the vendor web page. In this case, the BSP file is available in the Downloads section of the AMD webpage.

Now, we can start to develop the Linux project. In this step, we are going to need a machine running Linux. it can be a real machine or a virtual machine. To add all the needed environment variables to the PATH, we can execute the settings.sh script.
pablo@friday:~$ source /media/pablo/data_m2/xilinx/PetaLinux/2023.2/settings.sh
PetaLinux environment set to '/media/pablo/data_m2/xilinx/PetaLinux/2023.2'
WARNING: /bin/sh is not bash!
bash is PetaLinux recommended shell. Please sepetalinuxt your default shell to bash.
WARNING: This is not a supported OS
INFO: Checking free disk space
INFO: Checking installed tools
INFO: Checking installed development libraries
INFO: Checking network and other services
WARNING: No tftp server found - please refer to "UG1144 2023.2 PetaLinux Tools Documentation Reference Guide" for its impact and solution
Now, using the BSP file downloaded, we are going to create the Petalinux project.
pablo@friday:~/workspace_local/base_kd240/kd240_ptlnx_os$ petalinux-create -t project -s /media/pablo/data_m2/xilinx/PetaLinux/xilinx-kd240-starterkit-v2023.2-10140544.bsp --name kd240_ptlnx_os
When I am working with SOC and MPSOC devices, I always respect the next folder structure so I can reuse different commands. This is just a suggestion but it will make your life a little bit easier.

At this point, we have a Petalinux project created, and the next is linking the HW project to this Petalinux project. We will do this with the next command, and passing the folder where the .xsa generated by Vivado is located.
pablo@friday:~/workspace_local/base_kd240/kd240_ptlnx_os$ petalinux-config --get-hw-description=../kd240_ptlnx_hw
A configuration window will be opened, but in this case, we are not going to make any changes. Now, we are going to configure the root file system (rootfs). The idea of modifying the default configuration of the rootfs is to add some Petalinux Packages. These packages are sets of tools that will come preinstalled with Petalinux, for example, if we need Python in our device, we can add the packagegroup-petalinux-python-modules. The documentation about the packages available is the 2023.1. To configure the rootfs of Petalinux we need to execute the next command.
pablo@friday:~/workspace_local/base_kd240/kd240_ptlnx_os$ petalinux-config -c rootfs
Then, when the menu is opened, we need to navigate to Petalinux Package Groups and add the ones needed for our application.

The next is building the Linux image.
pablo@friday:~/workspace_local/base_kd240$ petalinux-build
After some time, the Linux compilation is ready, so we need to create the image that we will copy into an SD card. To generate the image, we are going to generate a .wic file with the next command.
pablo@friday:~/workspace_local/base_kd240$ petalinux-package --wic --images-dir images/linux/ --bootfiles "ramdisk.cpio.gz.u-boot,boot.scr,Image,system.dtb,system-zynqmp-sck-kd-g-revA.dtb"
Now, when we have the .wic file, we can write it into an SD card. To do that, in previous versions I created two partitions in the SD card, and sent the boot files to the first partition and the root file system to the other one. Following that steps, Petalinux does not boot correctly, so now, I use Balena Etcher to write the SD card. It is available for both Windows and Linux, and we just have to select the .wic file, the SD card unit and flash it.

At this point, we have the SD card ready. Before booting Linux, we need to update the boot of the Kria K24 SOM. We can activate the firmware update by pressing on the FWUEN button the the KD240, and powering on the board. Then, with an ethernet cable connected, from a browser we have to navigate to the ip 192.168.0.111, and the update page will be loaded.

Now, we just need to download the latest version of the boot from this page, and upload it to the KD240 kit.
With the boot image updated, and the SD card inserted, we can power on the KD240 kit again, and Linux must boot correctly.

We can use the user petalinux to log-in, and the password will be updated in the first log-in.
In my case, I installed the Python package, so by typing python we can develop applications using Python 3.10.6
xilinx-kd240-starterkit-20232:~$ python
Python 3.10.6 (main, Aug  1 2022, 20:38:21) [GCC 12.2.0] on linux
Type "help", "copyright", "credits" or "license" for more information.
>>> import numpy
>>>
Also, the same package enables the PIP installer so we can install Python packages.
xilinx-kd240-starterkit-20232:~$ pip3 install scipy
Defaulting to user installation because normal site-packages is not writeable
Collecting scipy
  Downloading scipy-1.13.0-cp310-cp310-manylinux_2_17_aarch64.manylinux2014_aarch64.whl (33.7 MB)
     ━━━━━━━━━━━━━━━━━━━━━━━━━━━━━━━━━━━━━━━━ 33.7/33.7 MB 3.1 MB/s eta 0:00:00
Requirement already satisfied: numpy<2.3,>=1.22.4 in /usr/lib/python3.10/site-packages (from scipy) (1.23.3)
Installing collected packages: scipy
Successfully installed scipy-1.13.0
Finally, I have also installed the packagegroup-petalinux-networking-stack, so I also have access to some net commands like ifconfig.
xilinx-kd240-starterkit-20232:~$ ifconfig
eth0: flags=4163<UP,BROADCAST,RUNNING,MULTICAST>  mtu 1500
        inet 192.168.55.254  netmask 255.255.255.0  broadcast 192.168.55.255
        inet6 fe80::20a:35ff:fe16:a9e0  prefixlen 64  scopeid 0x20<link>
        ether 00:0a:35:16:a9:e0  txqueuelen 1000  (Ethernet)
        RX packets 88  bytes 5823 (5.6 KiB)
        RX errors 0  dropped 0  overruns 0  frame 0
        TX packets 74  bytes 8980 (8.7 KiB)
        TX errors 0  dropped 0 overruns 0  carrier 0  collisions 0
        device interrupt 46

lo: flags=73<UP,LOOPBACK,RUNNING>  mtu 65536
        inet 127.0.0.1  netmask 255.0.0.0
        inet6 ::1  prefixlen 128  scopeid 0x10<host>
        loop  txqueuelen 1000  (Local Loopback)
        RX packets 10  bytes 748 (748.0 B)
        RX errors 0  dropped 0  overruns 0  frame 0
        TX packets 10  bytes 748 (748.0 B)
        TX errors 0  dropped 0 overruns 0  carrier 0  collisions 0
Installing Petalinux in a Zynq MPSOC is something that I have done many times, but when AMD releases a new version of its tools, almost in every version, I have to change a step of my workflow. Fortunately, the changes used to be minor changes, but they are different enough to make you lose some time. The possibilities of Petalinux are huge, so if you need some specific package or configuration, you can get more information in the UG1144.